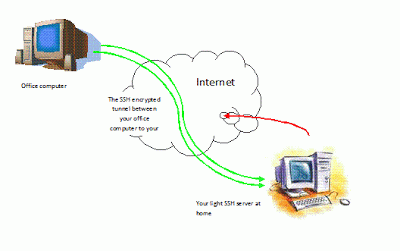
In the previous post we talked a little about ssh tunnels and and how to connect from a workstation to a server using an ssh client (puTTY) .
The ssh server we connected to last time was hosted at cjb.net, today I'm gonna show you how to host an ssh server on your own machine at home.
Now let's start the tutorial:
Requirements:
Steps:The ssh server we connected to last time was hosted at cjb.net, today I'm gonna show you how to host an ssh server on your own machine at home.
first, I have a few more stuff to add about ssh.
- How does it work?
All communications are encrypted using IDEA or one of several other ciphers (three-key triple-DES, DES, RC4-128, TSS, Blowfish). Encryption keys are exchanged using RSA, and data used in the key exchange is destroyed every hour (keys are not saved anywhere). Every host has an RSA key which is used to authenticate the host when RSA host authentication is used.
- What Kinda attack does ssh protect against?
+IP spoofing, where a remote host sends out packets which pretend to come from another, trusted host. Ssh even protects against a spoofer on the local network, who can pretend he is your router to the outside.
+IP source routing, where a host can pretend that an IP packet comes from another, trusted host.
+DNS spoofing, where an attacker forges name server records.
+Interception of cleartext passwords and other data by intermediate hosts.
+Manipulation of data by people in control of intermediate hosts.
+Attacks based on listening to X authentication data and spoofed connection to the X11 server.
Now let's start the tutorial:
Requirements:
- OpenSSH (OpenBSD Secure Shell) : a set of computer programs providing encrypted communication sessions over a computer network using ssh protocol.
- puTTy : Ssh client to test our server.
- And a few simple Linux Commands: cd(Change Directory), nano(text editor), touch (create a file), mkdir(make directory), sudo (Temporary SuperUser), cp(copy)
1-Installing openssh
2-Configuration
Before any modification you should save a backup of the original configuration in case you messed something up and didn't know how to fix it.
To configure the server, we have to edit sshd_config.
There is plenty of option to modify and configure but in this tutorial, let's focus on the crucial and important ones.
Deny Root login
This will keep anyone from attempting to log into your server via SSH as root. It’s generally a good idea not to allow any to log into your SSH server as root. If an attacker manages to hack into your SSH server with the root login, he will have complete control over your machine, and that is definitely not a good thing.
Allow users
Only users specifically specified in the directive can access the system through SSH.
In this example we allowed only two users (h20 and klmn) to access to our server.
Change Listening port
By default SSH runs over TCP/IP port 22, which means that any malware bot autoscanning port 22 can target it. So it's a good idea to change the port to any another unreserved port. ( about 250 well-known ports are reserved by convention to identify specific service types on a host)
And finally after we are done with the editing, we save the config file (CTRL+O) and restart the shh server.
Basically we're done. All we need now is to test the server to verify if it's working properly.
3-Testing
Now, to ensure that our server is working well. We're gonna try to connect to our machine through puTTY(ssh client) do some changes then we're gonna disconnect and verify if these changes were applied.
PuTTY configuration:
This is very simple, we just have to fill the hostname and the port field.
Now for testing reasons I'm connecting my hostname will be localhost (127.0.0.1).
The default port is 22, so we change it to 8700 as we set it up in the server configuration.
***if you're connecting from another machine instead of this IP (127.0.0.1) you put the IP of the server.
Once the session is open, we log in with the user name and password.
And then we're gonna do some random stuff.
In the following example I made a directory called hello and inside of it i created two files (hello and world).
After this we close the session.
Verification
After we close the ssh session we need to verify that the changes were applied.
As you see in the picture below two files were created inside the directory hello.
Logs
So you can see that logs can be very important to stop hacker from attacking you. ( by blocking the ip of a user who had failed attempts very much in a short period for exemple.)
So you can find the ssh log in : /var/log/auth.log
Congratulations! You've succeeded to set up your first ssh server.
I hope this post was helpful, and thanks for providing your feedbacks


No comments:
Post a Comment